UiPath Document Understanding with NER

Introduction
In today's world, organizations process many different documents daily. Document processing has gained a lot of attention in the automation world as it is a very monotonous task that requires a lot of time and effort. The documents come in different layouts: structured, semi-structured, and unstructured. It can be easy to apply templates to extract data from structured documents as they follow the same structure in all the papers. Today's technology enables us to use various machine learning models to extract information from semi-structured documents such as invoices, purchase orders, etc. However, extracting information from unstructured documents can be a bit tricky as the document doesn't follow a format. In this article, you will find out how UiPath named entity recognition model enables users to extract entity information from unstructured documents.
Requirements
Before getting started, you'll need the following:
1. Basic understanding of the UiPath Document Understanding Framework
2. Overview of UiPath AI Center™ and its usage
3. Already available (newly created cloud platform trial, or enterprise)
Building the scenario
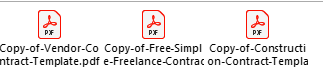
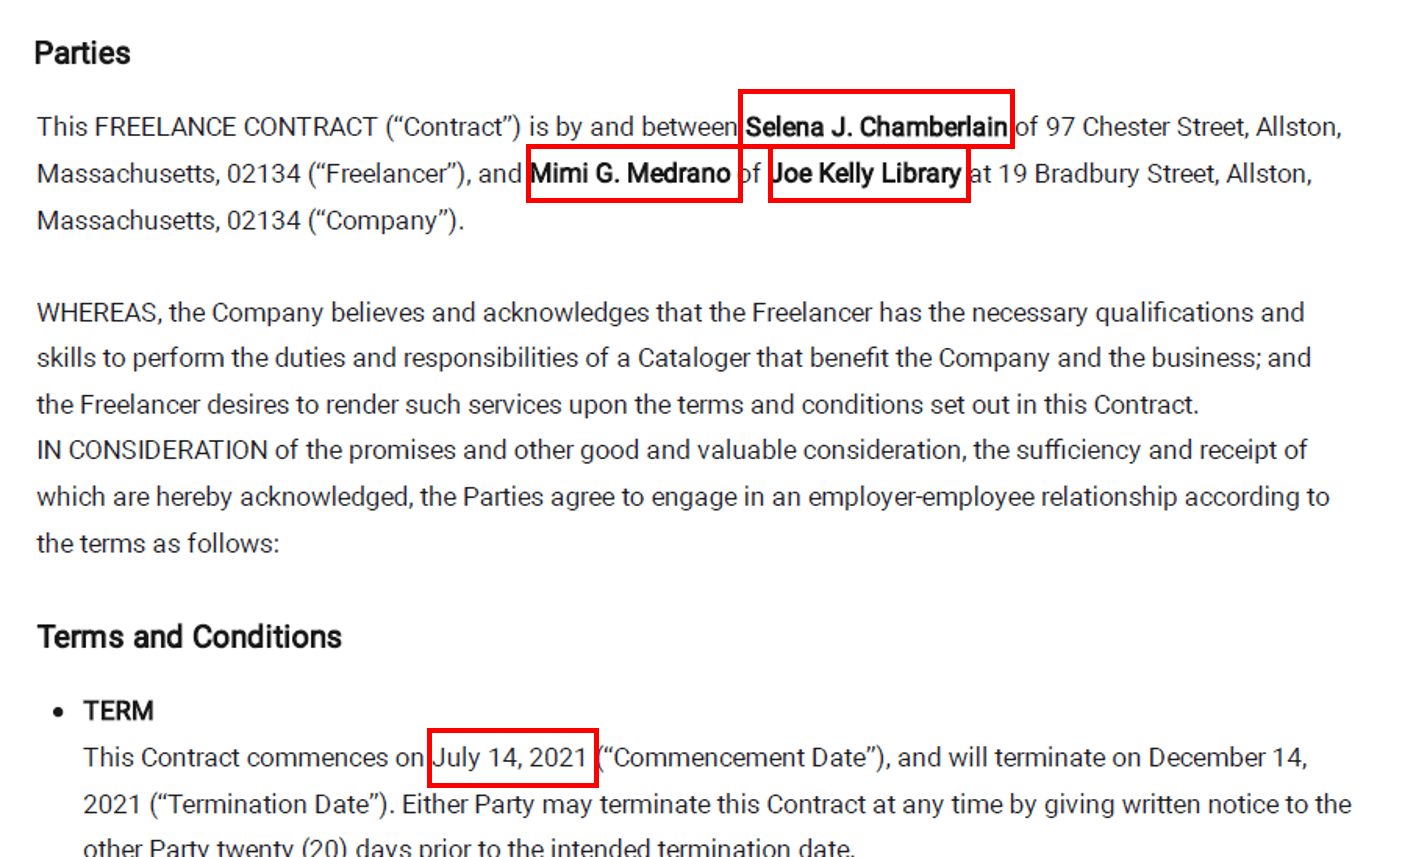
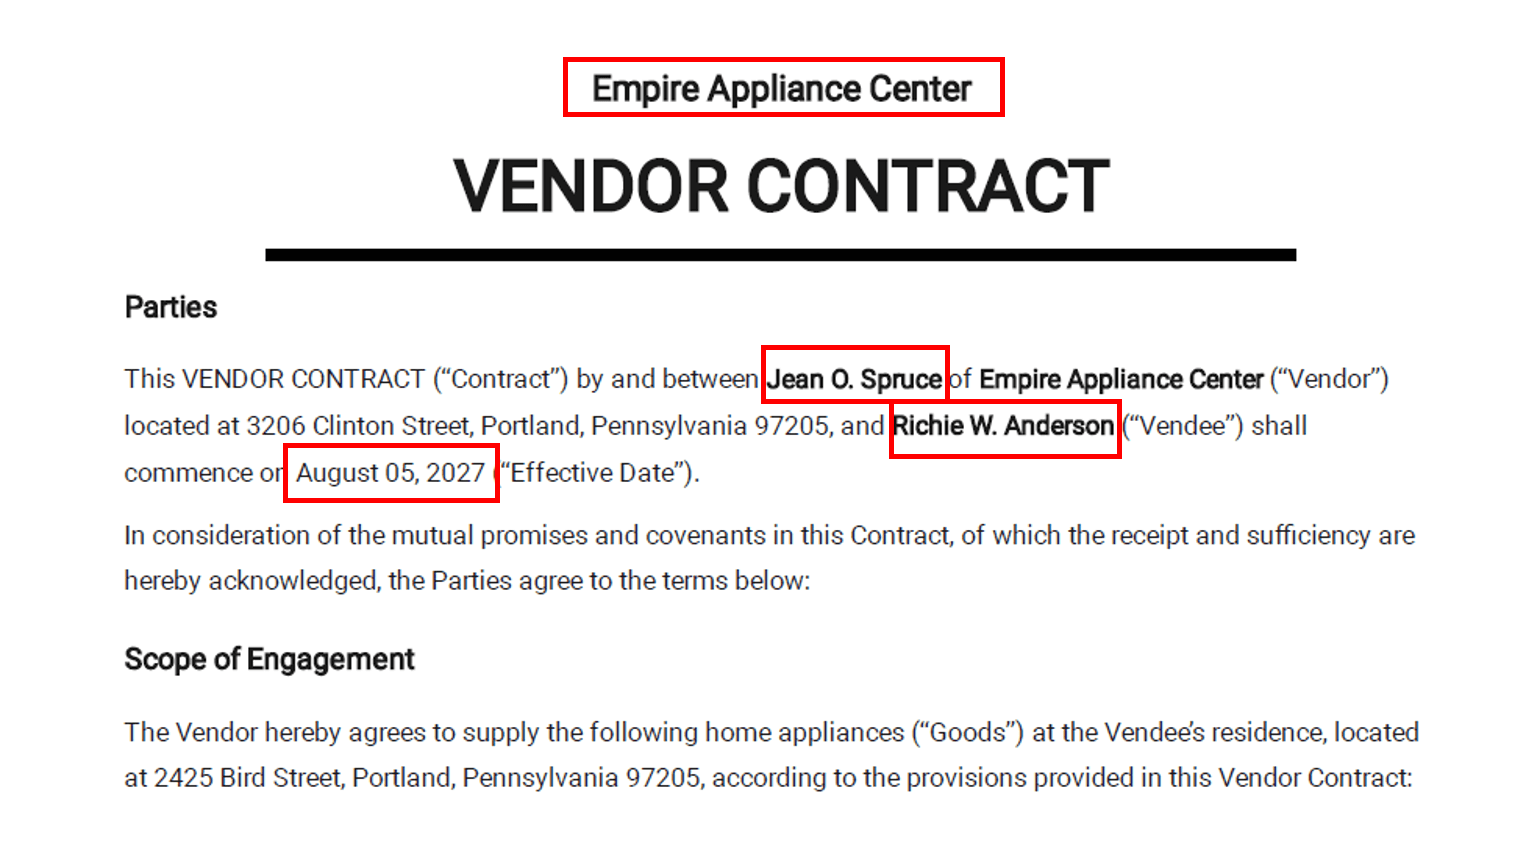
Let’s consider a simple scenario where we need to extract certain information from legal contracts. As we know, legal contracts are very unstructured and do not follow a particular format. Hence, the information available in one legal document may not be available in another legal document, or it may be available in a different format. In our scenario here, we are mainly looking at information such as company name, employee name, vendee name, and document effective date. The following are a few sample legal documents that we plan to use for this use case.
Let's now have a look at what named entity recognition (NER) is, and how it helps us extract the information we need from these documents.
Named entity recognition
Named entity recognition is a process of identifying and extracting information units such as names, of people, organizations, numeric values, date and time, information, geolocations, etc. The models used for NER can identify such information from a given string and categorize it according to its type. UiPath AI Center™ offers a pretrained NER model and a custom NER model under the out-of-the-box packages that we can plug and play to extract the information we are looking at in this scenario.
We can use the pretrained NER model for this use case.
However, if you wish to identify your own customized information, you can easily create your own NER model through UiPath. However, this is a topic for another article. The model provided by UiPath can extract the following information from a given string.
PERSON – names of people
GEO – geo locations
DATE – time and date
MONEY – currency information in a string (figures and amount in text)
ORG – Organization names
GPO – Geopolitical information and many more
As we now have an idea about NER, and the capabilities available with UiPath, let's get back to our scenario, and start building a simple flow.
Step 1 Creating NER skill in UiPath AI Center™
Firstly, try to get the ML skill up and running so that we can build the workflow around it. Let's follow the below steps to get the model created in AI Center™ once you sign in to cloud environment.
Step 1.1. Creating an AI Center™ project
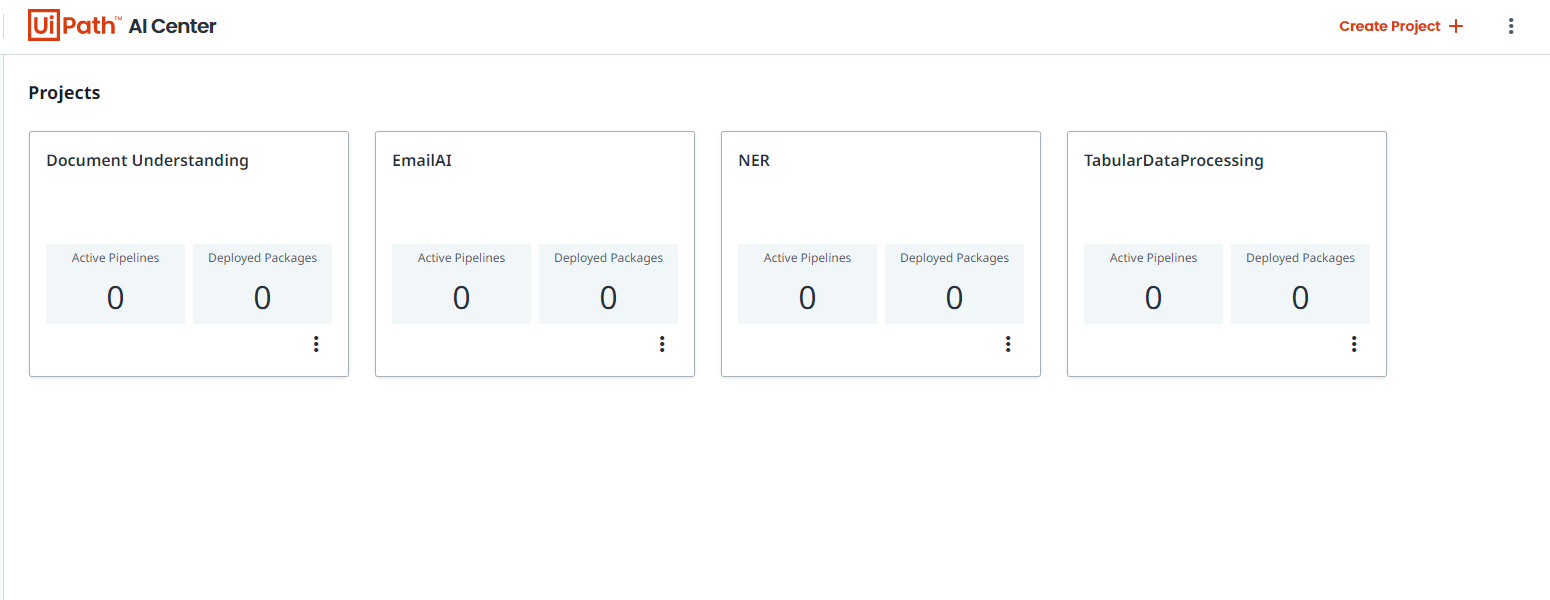
Once you sign in and navigate into the AI Center™, you'll land on AI Center™ home page which displays all the projects you have created. Let's create a new project by clicking on Create Project button on the top right and giving it a meaningful name.
Once the project is created, let’s navigate into the project so we can start configuring it.
Step 1.2. Creating NER package
The left side panel of AI Center™ contains all the stages an ML model goes through.
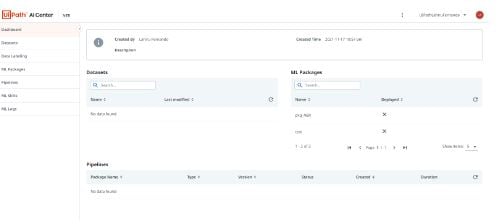
Since we are using a pre-trained model that doesn't require additional training, we can skip the datasets, data labeling parts. Let's get into the
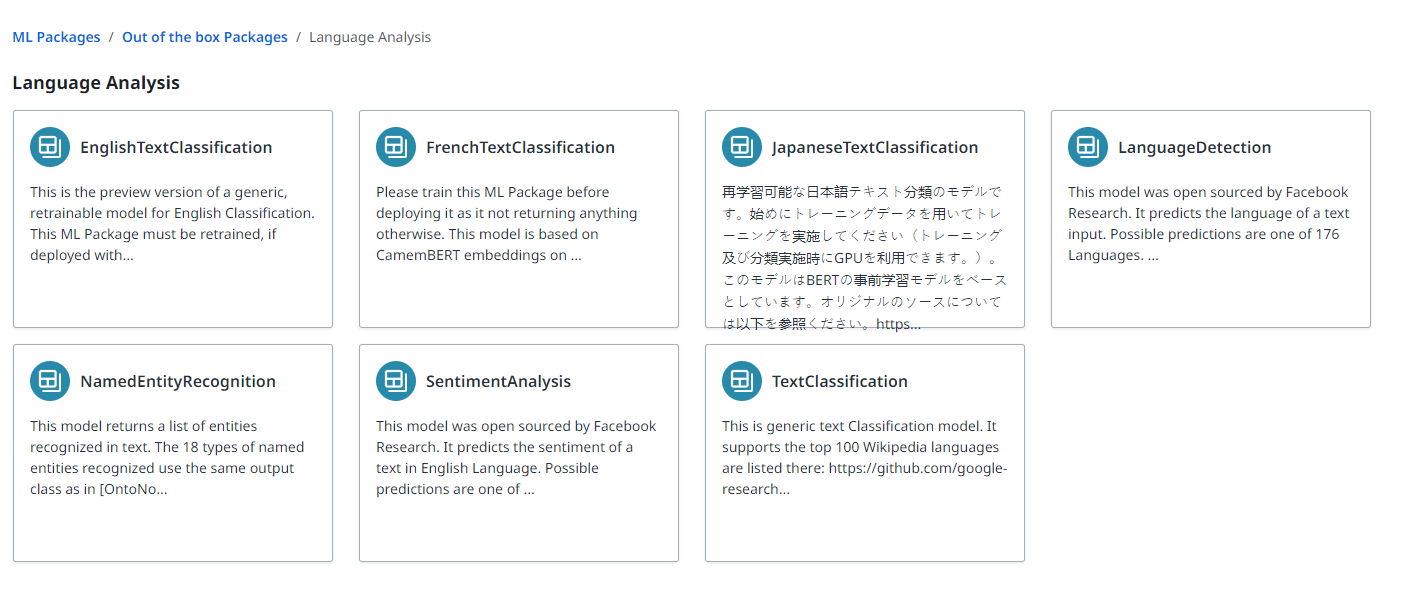
ML packages
section and navigate to the out-of-the-box packages section.
Navigate into the Language Analysis category to locate the NER model. Follow the below steps to create the package.
Select the NER model and view the details page.
Click on the blue Submit button to start creating the package
Provide a meaningful name such as "Pkg_NER" and click on the Create button to create the package.
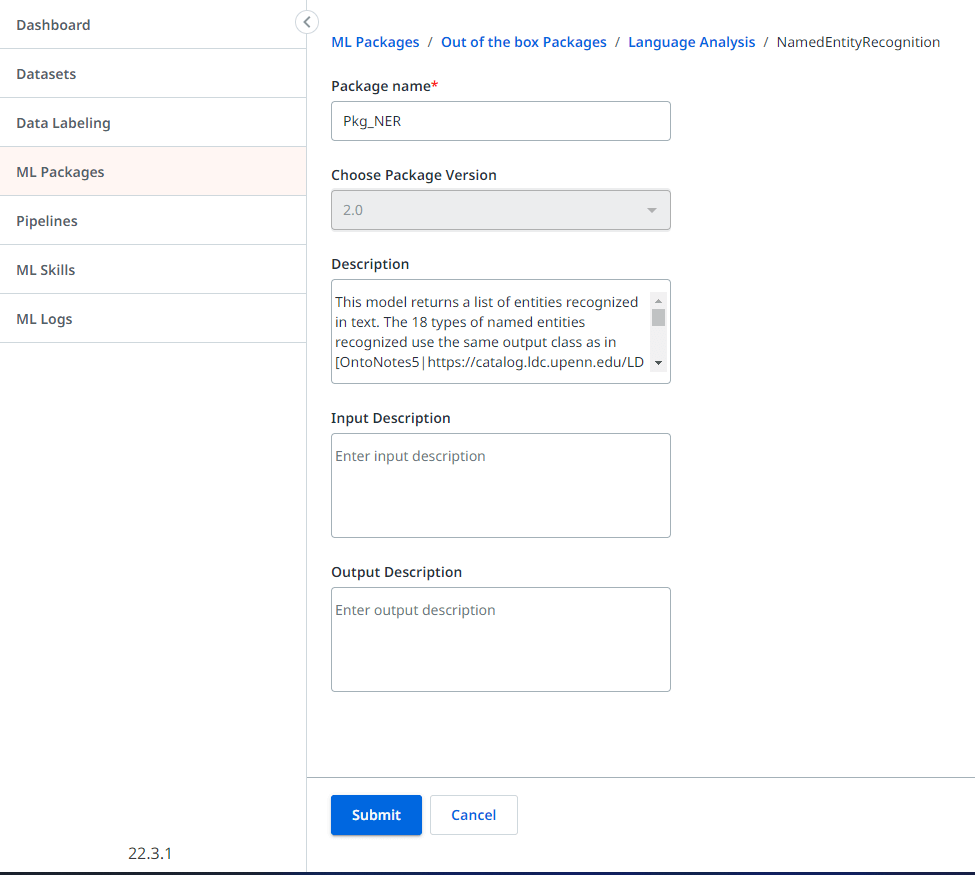
Once you complete the above steps, you should see the created package under the ML packages section in AI Center™ .
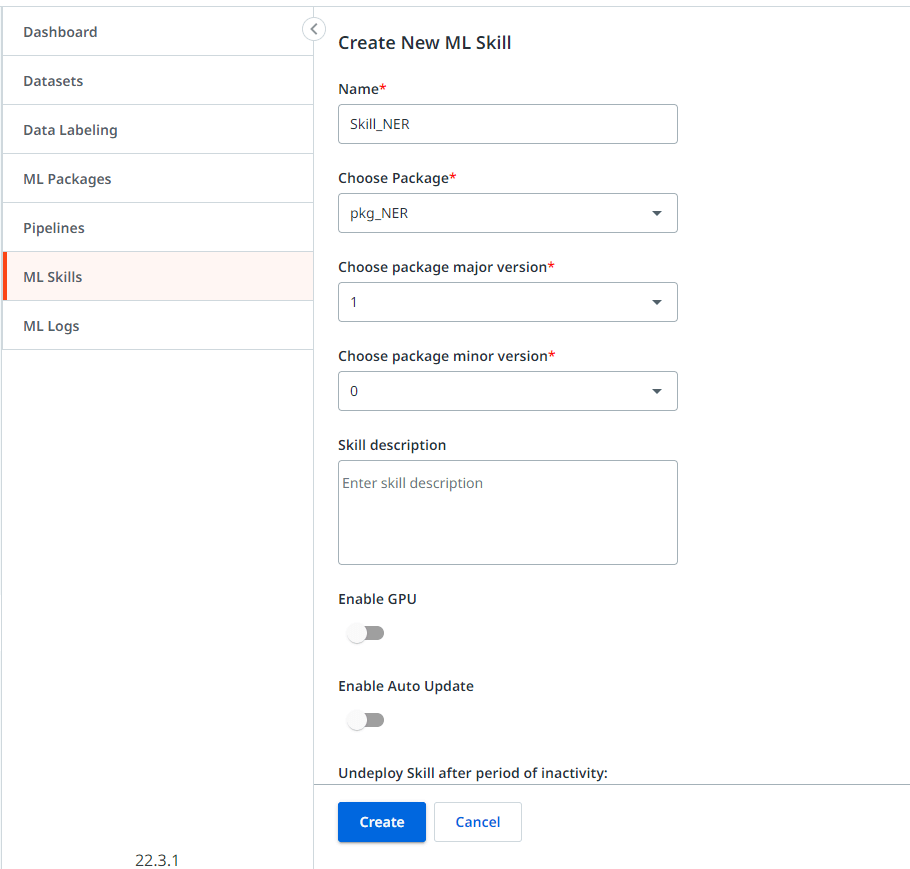
Step 1.3. Creating ML Skill
Navigate into the ML Skills section in the AI Center™ and follow the below steps to create the NER skill.
Click on the Create New option to navigate to skill creation page.
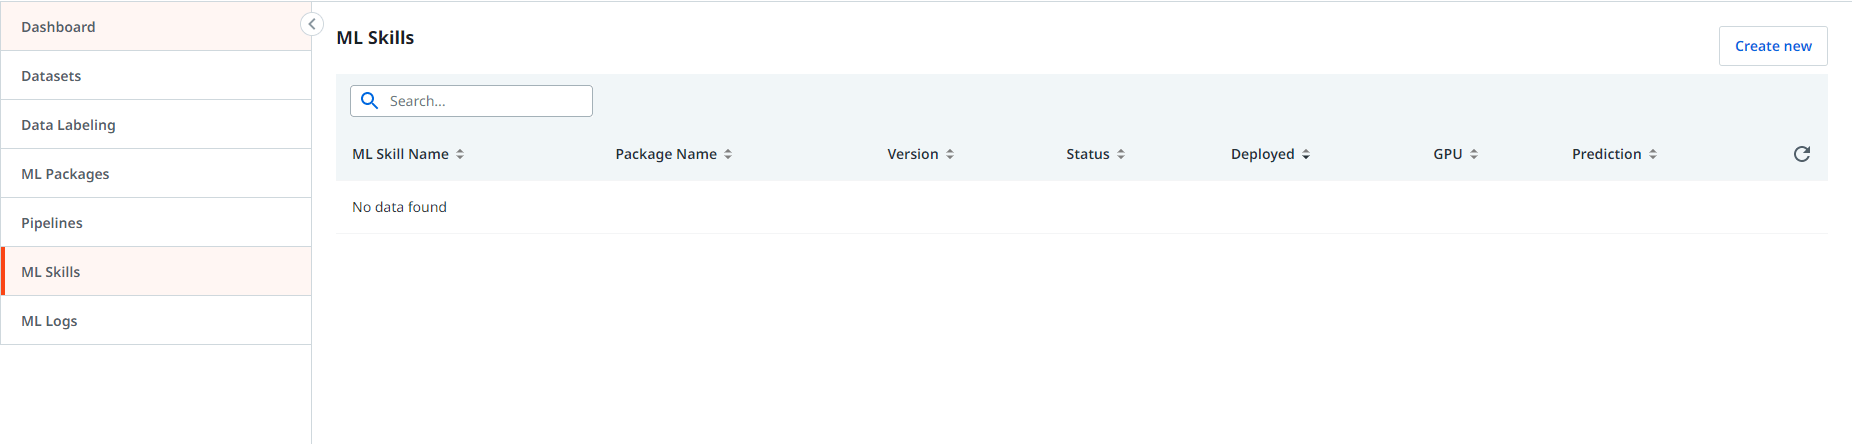
Provide a meaningful skill name such as “Skill_NER” for the scenario. Select the NER package created from the dropdown menu under ML package. Select the major version option with the latest version available in the package. Select the minor version with the oldest version (ideally zero). Click on the Create button to start deploying the skill.
Once you complete the above steps, you will see the model being deployed in the ML skills section. It would take a while to complete and wait until the status changes to “Available.” You will need to manually refresh the page to see the status change.
Step 2 Preparing the Document Understanding solution
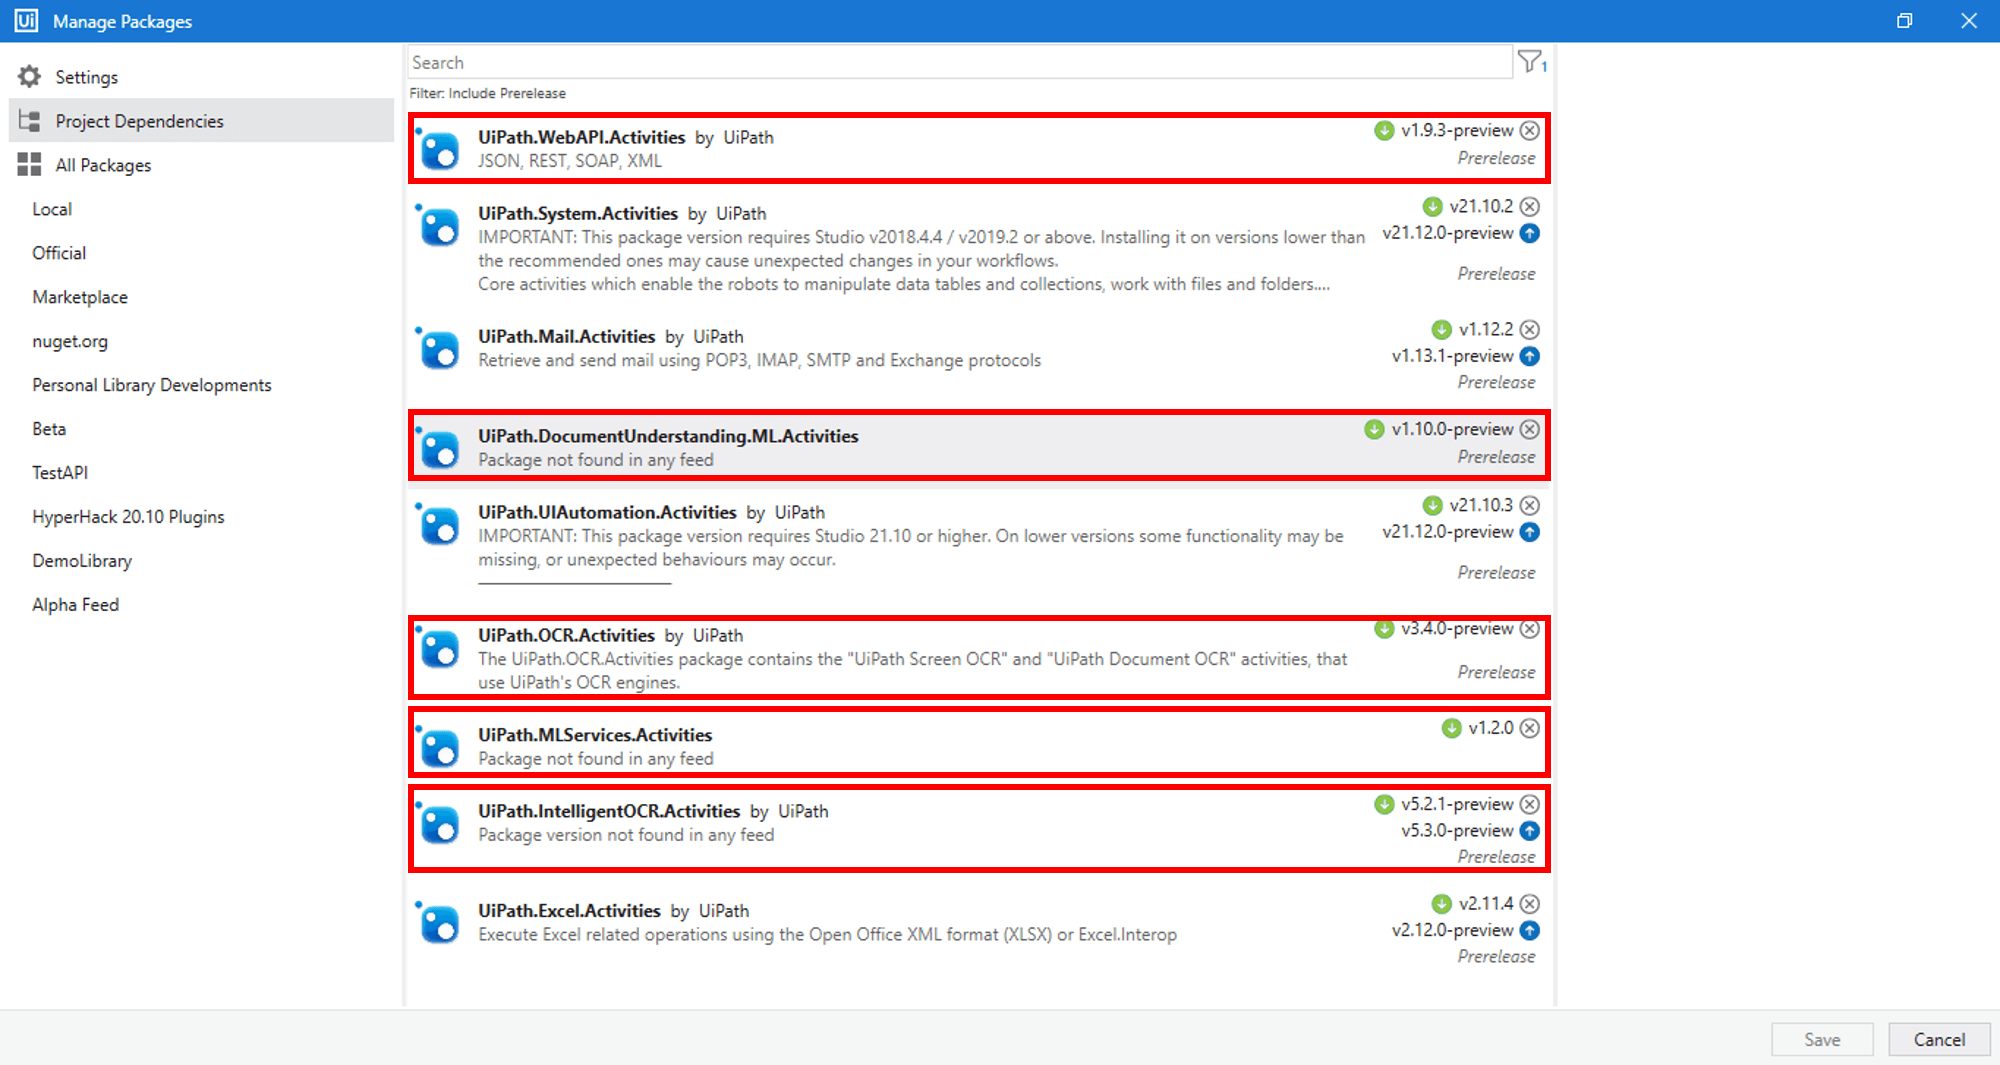
Let’s now have a look at how to create the workflow in Studio. Create a new simple process in UiPath Studio and add the following dependencies.
UiPath.DocumentUnderstanding.ML.Activities
UiPath.IntelligentOCR.Activities
UiPath.OCR.Activities
In addition to the above dependencies, we need two additional dependencies to use the NER model. Add the following dependencies.
UiPath.MLServices.Activities
UiPath.WebAPI.Activities
As we now have the solution prepared, let's start building our workflow.
Step 3 Building the workflow
We have one important thing to remember here. Document Understanding flow can generate the validated data for us through multiple extractors such as ML Extractor, Form Extractor, etc. All such extracted data are usually saved in an Excel file with the column names defined in the Taxonomy. We can use the same Excel file to store the NER data and perform the data manipulations later. NER is used for unstructured data. Hence, it requires some level of logic building after data is extracted.
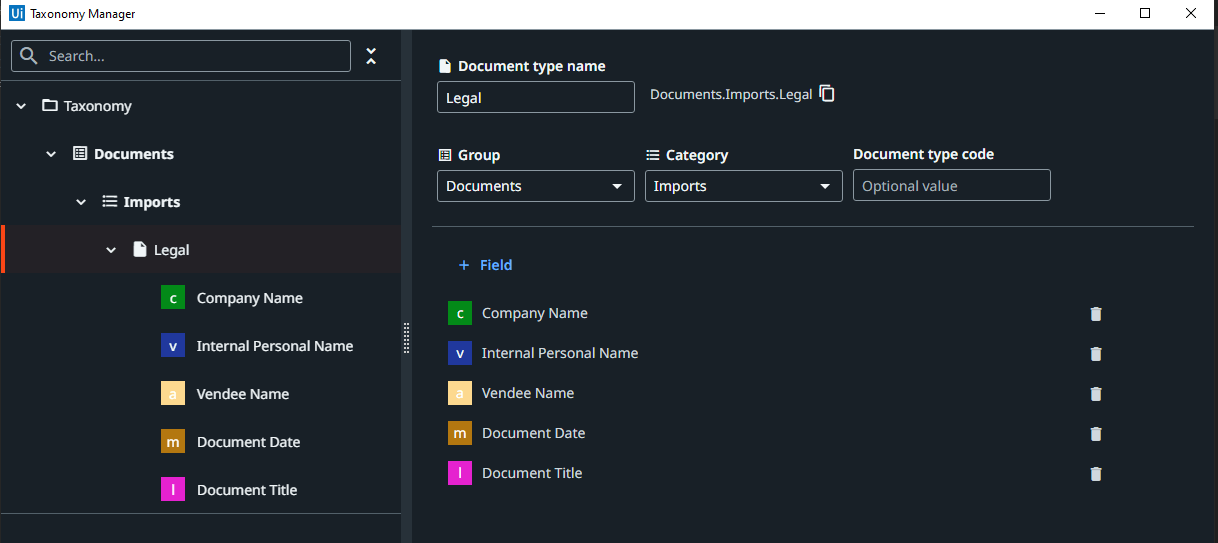
Step 3.1. Create taxonomy
Irrespective of whether the document is structured, or unstructured, create the taxonomy with the fields we need. In our case, we can use the following fields.
Step 3.2. Building the workflow
Let's follow the below steps to create our workflow.
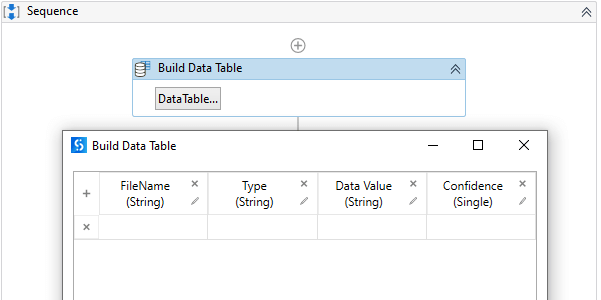
Use a Build Data table Activity to store the NER data as shown in the following screenshot.
Drag and drop the Load Taxonomy Activity and configure it to get the Taxnomy.
Let's include all the documents we want to process in a folder named "Input Files".
Now, let's use For Each file activity to loop through the files in the folder as shown in the following screenshot.
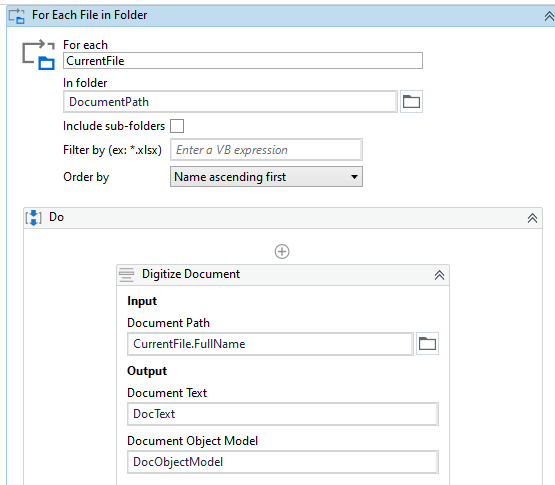
Use a Digitize Document Activity to convert the document into a digital format as shown in the above screenshot.
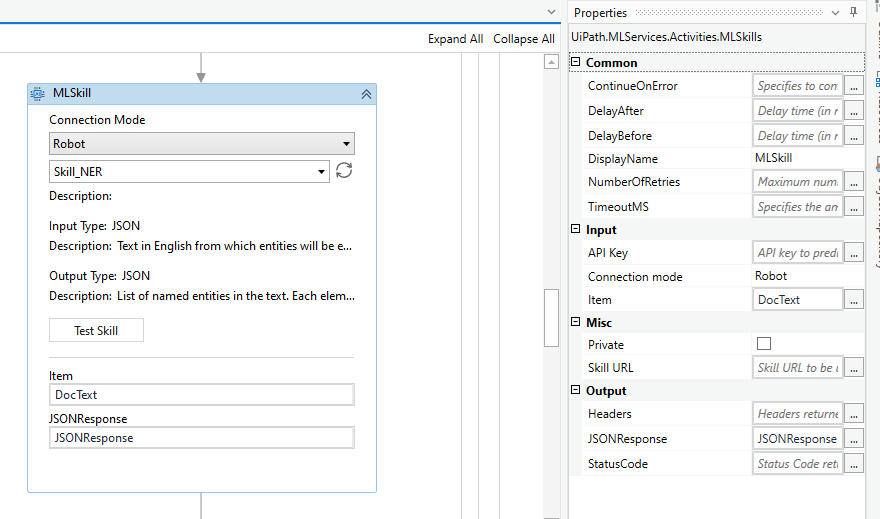
Drag and drop the ML Skill Activity and configure it to connect with the ML Skill in the AI Center™. You can either connect by selecting Connection Mode as Robot or Endpoint (You need to make the model public to use the endpoint). Let's use Robot connection method and select the ML Skill by clicking on the refresh button and selecting the model from the dropdown option.
The model expects a string as input and provides a JSON array string as the output. Configure the Activity as follows.
Once we get the output, we need to deserialize the response to gain access to the array structure and its elements. To deserialize, let's use the Deserialize JSON Array Activity and configure it as shown in the following screenshot.

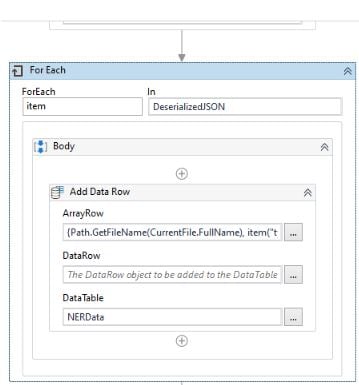
Once we deserialize, we can easily loop through the items in the array. Now, let's use a For Each Activity to loop through the deserialized Json Array. The type argument of the For Each Activity is Newtonsoft.Json.Linq.JObject.
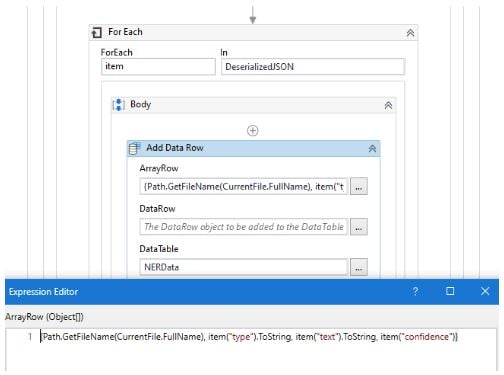
Place an Add Data Row Activity within the For Each Activity as shown in the following screenshot.
Configure the Add Data Row Activity to get the information we need as follows. The "Type" column provides to which entity a specific value belongs to, and the "Text" column provides the identified value along with confidence specified in "Confidence" column.
Now you can use a Write-Range Activity to write the NER data available in the data table to the same Excel sheet used to store data extracted by Document Understanding extraction methods. As a best practice, always use a separate sheet in the same Excel file for the initial NER data export. The data written in the Excel file would look similar to the following.
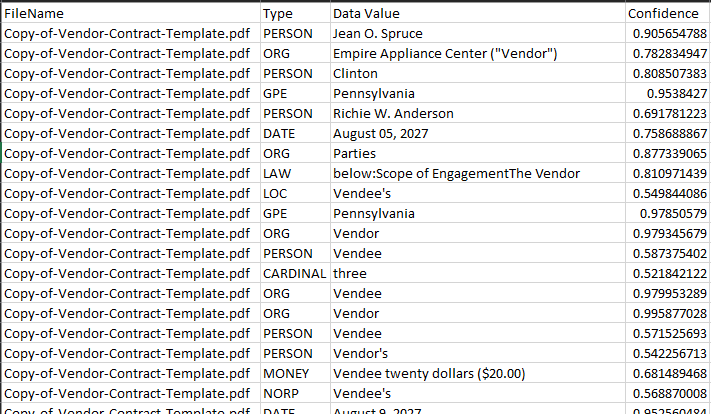
Exported NER data
NER data provides all the information the model can find through the Document Text. Once the data is extracted, we need to write a common business logic that applies to all the documents to extract only the information we need. This logic is purely written based on the patterns we identify in the extracted data. We can easily filter the information using the type (ex: PERSON, ORG, DATE), and extract the values using the order of values. Keep in mind that all values are extracted based on the order you see them in the document from top to bottom. Further, it'd be always easier if you used the Microsoft Excel sheet as a working sheet until you prepare the data and update another sheet that contains the taxonomy as shown below.
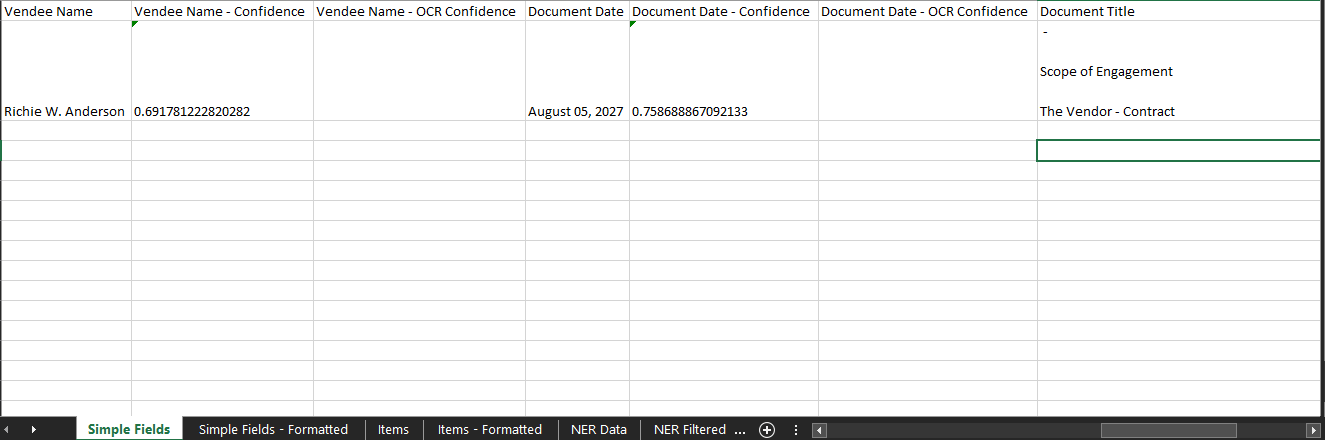
Once you have the data in this format, we can easily use this structure to pass the data into downstream applications or other automation processes.
If you want to see the steps in video format, you can navigate here and here to gain more details and easily follow.
Conclusion
Document processing isn't always straight forward due to the complexity of documents created for each department. However, with the capabilities that UiPath offers with Document Understanding, and AI Center™, a lot of complicated processing has become much simpler. NER is one of the AI models that enables users to extract data from unstructured documents as described in this article. Additionally, you can explore more here and here about NER use cases and how this model is used.

Country Director, Boundaryless Group
Related articles